Cooling
Well, still waiting for the beans (T minus 3 days), but I have almost finished my cooling system. Once the beans have attained the proper degree of roast, it is important to cool them quickly to stop the "baking" that may occur, which apparently will dull the flavor of the coffee.
I can't claim that this cooling device is of my own design, I stole without compunction from INeedCoffee.com. In my variation I use a cardboard box instead of a paint bucket.
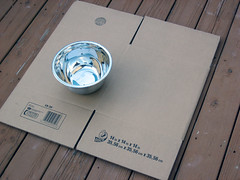
I wasn't able to find the right colander, so I decided to make my own: I picked up a 3-quart stainless steel bowl at Walmart for $2.96. I also got a 14"x14"x14" cardboard box for $1.94 and some wooden spoons for stirring:

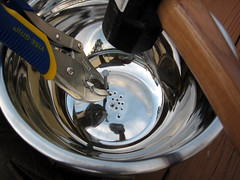
With these raw materials, I started pounding holes in the bottom of the bowl with a hammer and nail:
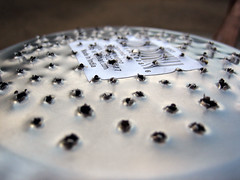
Not exactly a precision job, but hey- airflow is the goal. I will also be stirring the beans, so it's not like it has to have uniform holes. A caveat here is that the bottom of the bowl gets pretty ugly with exit wounds. The bottom also becomes somewhat convex due to the pounding. That's not a problem, in fact, it may be better in that it will cause the beans to move toward the center of the bottom, which has good hole coverage.
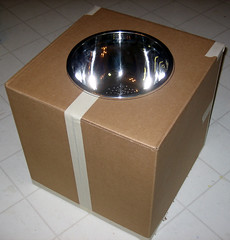
Next I assembled the box and taped it up with masking tape to minimize air leaks. I sawed a hole in the top that just fit the stainless bowl:

I haven't decided yet whether the bowl should be taped, hotglued or can just sit in the hole. I will insert another hole in the side of the box to accept the shop vac hose. I think this will generate enough airflow to cool the beans within 2 minutes. If it turns out the box isn't sturdy enough, I could shellac it...
In the meantime, I found this video on Google Video by Scott Marquardt that shows roasting with a hot air popper and cooling with a similar cooler (made from a box):
I can't claim that this cooling device is of my own design, I stole without compunction from INeedCoffee.com. In my variation I use a cardboard box instead of a paint bucket.
I wasn't able to find the right colander, so I decided to make my own: I picked up a 3-quart stainless steel bowl at Walmart for $2.96. I also got a 14"x14"x14" cardboard box for $1.94 and some wooden spoons for stirring:

With these raw materials, I started pounding holes in the bottom of the bowl with a hammer and nail:
 |  |
Not exactly a precision job, but hey- airflow is the goal. I will also be stirring the beans, so it's not like it has to have uniform holes. A caveat here is that the bottom of the bowl gets pretty ugly with exit wounds. The bottom also becomes somewhat convex due to the pounding. That's not a problem, in fact, it may be better in that it will cause the beans to move toward the center of the bottom, which has good hole coverage.
Next I assembled the box and taped it up with masking tape to minimize air leaks. I sawed a hole in the top that just fit the stainless bowl:

I haven't decided yet whether the bowl should be taped, hotglued or can just sit in the hole. I will insert another hole in the side of the box to accept the shop vac hose. I think this will generate enough airflow to cool the beans within 2 minutes. If it turns out the box isn't sturdy enough, I could shellac it...
In the meantime, I found this video on Google Video by Scott Marquardt that shows roasting with a hot air popper and cooling with a similar cooler (made from a box):

0 Comments:
Post a Comment
<< Home